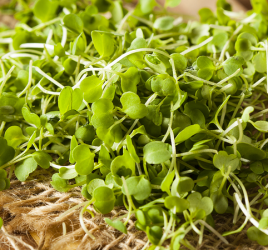
Microgreens Growing Tips: How to Grow Salads on Your Tabletop
Would you like to grow your own microgreens indoors? Let’s take a closer look at our top microgreens growing tips.
Microgreens are very good for your health. They have the vitamins, minerals, and antioxidants of many full-grown vegetables but in high concentration; sometimes up to 40 times higher than their mature counterparts.
Add to that the sour or spicy punch they add to your food, and you have a real superfood.
You can grow them right on your windowsill or tabletop; reasonably inexpensively. They are so easy to grow and valuable, that microgreen farming is a trend almost anyone could follow.
Microgreens Growing Tips: Supplies Needed
Did I mention how easy this is? Microgreen growing is a perfect project for a beginner. Here are top microgreens growing tips for the supplies you will need:
Growing trays with no drainage holes
This is important. Hydroponic supplies should have them if you can’t find them at your local garden shop.
You need at least two trays or double the number of trays you plan to grow.
Each growing tray needs a lid to block the light and to help create humidity. Your seeds will not sprout without complete darkness and constant moisture.
Growing media
Seeds need something to sprout in; hydroponic media, compost, perlite, and vermiculite mix or potting soil.
If you are growing bigger seeds, soil works a little bit better whereas small seeds like lettuce and kale do fine in some other media.
Hydroponic media makes harvesting and cleaning easy, which is essential. You don’t want to have to wash your delicate little microgreens as it can damage them.
“Sure to Grow” pads come in the exact size you need 10″ x 20″ and they are the easiest to work with as well as the cleanest.
However, they are plastic, and you will have to use a new one each time. If you are concerned about the environment and you don’t want to add another single-use plastic to a landfill, you could use coconut coir.
Coconut coir is sustainable in that it can be reused after every grow, but it takes more work to reuse it.
Soil is your absolute best bet for sustainable growing medium. It can be vermicomposted. You can use it over and over again. However, it is the hardest medium for purposes of cleanliness and harvesting.
Spray bottle
Microgreen seeds
Seeds will probably be your single most significant expense. You can get all of your supplies at a dedicated microgreen store online, but it will cost you extra.
However, you do want to get high-quality seeds, so if you are only getting one thing from the microgreen store, get the seeds.
Some stores sell kits with everything you need, which can be helpful. And some sell packages of seed arrangements that make a colorful and attractive centerpiece that is edible.
If all you want is to try your hand, get a cheap four-ounce package to start.
Hydroponic Nutrients
Nutrients are not absolutely necessary for microgreens. Hydroponic nutrients are more for those who are growing mature vegetables inside and need more nutritional support. Some microgreen growers like to use General Hydroponics FloraGro a few days before they harvest.
pH Down or pH Testing Kit
Microgreens do need pH adjustment, however, because they like an acidic environment and most water we drink is too alkaline for microgreens. pH down adjusts your tap water so microgreens will love it.
Preparing and Planting
Growing media – There is not too much to prep for microgreen growing. If you have a tray and some media, spread the media out around the bottom of the tray. If you have a grow pad, just drop in it!
Water
If you are unfamiliar with how to properly pH your water, this next step may require a little practice.
If you don’t want to spend over $100 on a nutrient monitor, you can purchase a pH testing kit made especially for hydroponics for less than $15.
The main thing is that for microgreens, you need a pH between 5.5-6.0. Four cups of the adjusted water should go into the growing media in your tray.
Smooth
Smooth your growing surface. You want it as uniform as possible.
Plant
Sprinkle your seeds over the growing media in your tray. Try to get as even coverage as you can.
The smaller the seeds, the more careful you need to be about even coverage.
Larger seeds may be easier, but make sure to plant enough. Each seed will only sprout one microgreen, and you are going for density.
Make sure you label your seeds. As you get more practiced, it’s possible to make microgreen art by planting your seeds in different patterns.
Spray
Now it’s time to mist your seeds with pH balanced water from your spray bottle. They need plenty of moisture to germinate.
Darkness
Seeds need darkness to germinate. Select a warm place for your newly planted seed tray and grab the other tray to be used as a lid.
Spray water on the inside of the lid tray and place it upside down on top of the seed tray.
Make sure it stays around 70 degrees Fahrenheit where you have put the tray, and that no light leaks through.
Mist them every 12 hours for the first 3-4 days as they are germinating and starting to sprout. Don’t worry about lifting the lid now and then. It won’t interrupt their germination to check on them this much.
Time for Sunlight
After your seeds have finished germinating, about two days after you plant them, continue to grow them under the blackout lid for another few days.
It will take up to 4 days for the sprouts to reach optimum height for exposure to the sunlight. At this point, they won’t be the color they will be eventually. It takes sunlight to turn your plants green.
After four days, take off the dome and expose them to sunlight. You can do this in several ways:
- either on a sunny windowsill or kitchen table
- outside on a porch or patio,
- or inside under LED lights.
The great thing about LED lights is that you can control the consistency of the growing environment and don’t have to worry about wind or a sudden downpour – or children and pets!
Your sprouts should start to turn their normal color as photosynthesis begins in the next 36 hours.
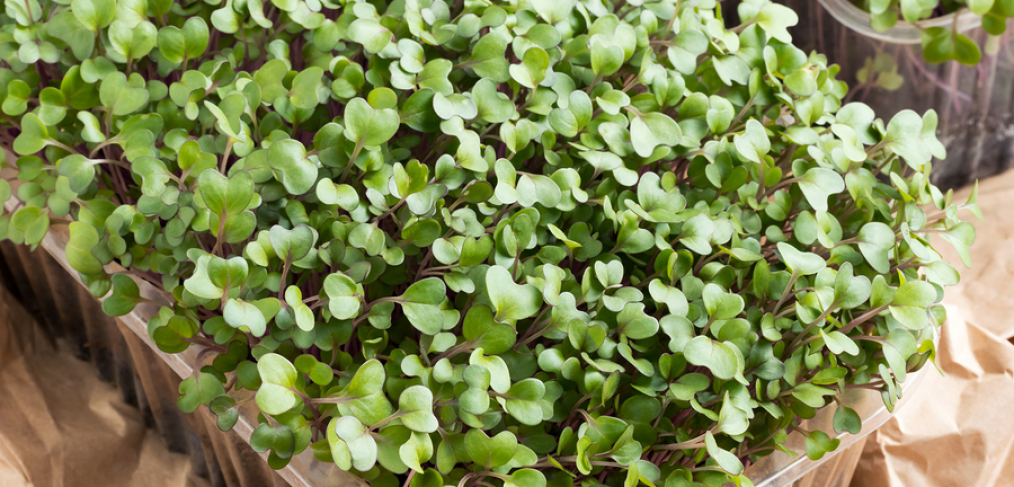
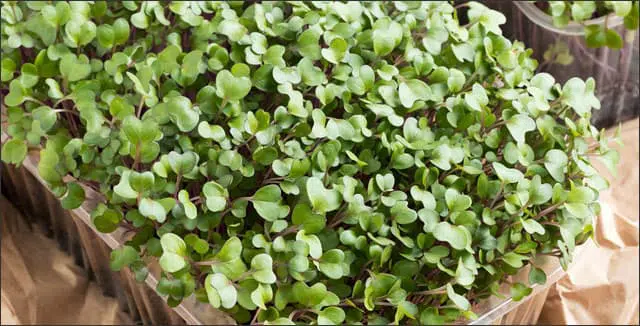
They will grow taller and healthier the more you let them age. Real leaves should start to emerge, and this is your sign that the microgreens are ready to harvest.
When you collect is up to you; you can use them at this point or let them mature a bit longer. If you are trying to make money selling microgreens, the faster turnaround time is what you are probably after.
Harvest
How you harvest your greens is up to you. The main thing is not to pull the roots out of the soil or growing material, and not to collect debris or seed hulls with your greens.
Plan to leave about ½” of the stem, so you don’t have to wash your microgreens. Cleaning them will decrease their storage longevity by 30%.
You can use any sharp tool to harvest – a knife, scissors, specialty microgreen harvesting machinery, or grass shears. You want something that is nice and sharp and does a quick, clean cut.
Enjoy
It’s up to you to figure out how to eat your microgreens! They taste great on sandwiches, wraps, salads, soups and much more.
Over to You
Do you have any microgreens growing tips to add to this list? Please share them in the comment section below.