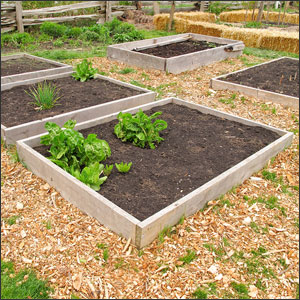
How to Build a Raised Garden Bed

Do you have rocky or sandy soil?
Are you looking for a great way to have a garden with low maintenance?
If you looking to have a garden, but don’t have great soil, a raised garden bed is for you. That is not the only reason why this type of gardening is becoming more and more preferred. In our article, The Benefits of Using a Raised Gardening Bed, we outlined why raised gardening beds are a great option.
Today, we wanted to take some time to share with you how to construct a raised gardening bed. With these tips you’ll be gardening in no time.
- The first step is deciding how big you want the bed to be. Typically, a raised bed in about 4 feet wide, but you can choose from many options including:
- 4 Feet by 4 Feet
- 4 feet by 8 feet
- 4 feet by 12 feet
- Make sure to pick a spot that is level and has the amount of sunshine required by the plants you intend to plant.
- The Old Farmer’s Almanac recommends keeping the depth of the bed to at least 6 inches and preferably 12 inches. This will make sure your plants roots have plenty of room to grow.
- Lumber is the most commonly used material when it comes to building gardening bed.
- When you pick out your lumber make sure to select pieces that are straight.
- To attach the side boards to the end boards, drill 3 holes, making sure that the holes are evenly spaced. Secure the boards together with screws.
- Make sure each corner has a support attached to it.
- Organic Gardening recommends attaching a center brace,
“Attach the center brace to join the two sides at their midpoints. Use a square to position the brace at a right angle to the sides (5). The brace prevents the sides from bowing outward when the bed is filled with soil.”
- Next, add the soil and then you can start gardening.
Have you started your spring to-do list? It is never too early for planning and dreaming. Please let us know what you’re planning in the comment section below.


