How to Grow a Wildflower Meadow
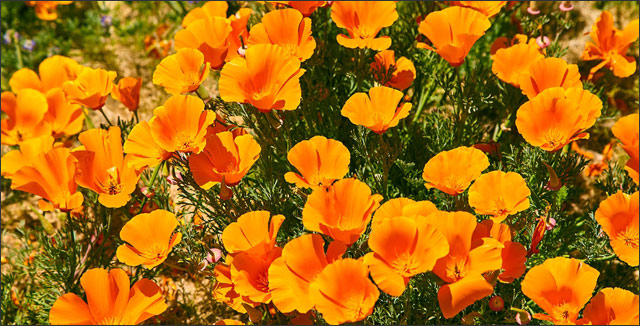
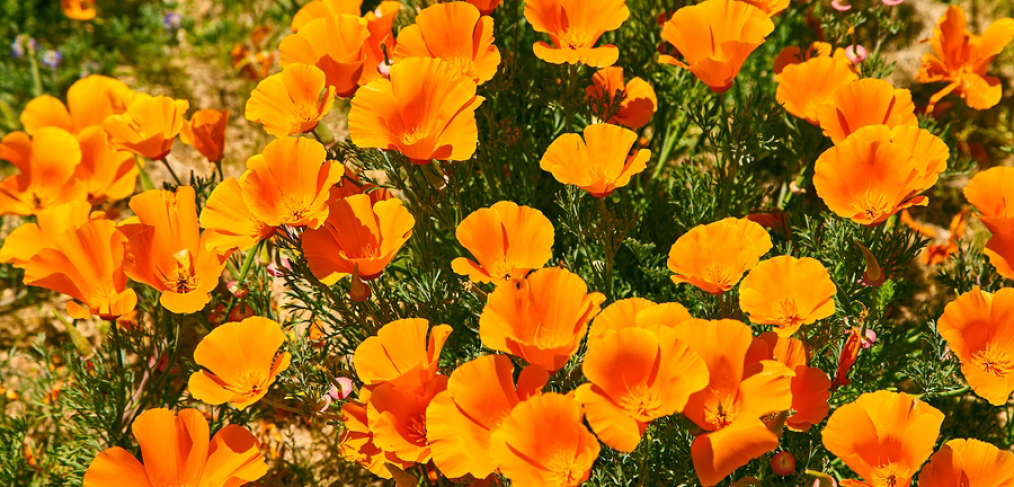
California poppy wildflower meadow at the Antelope Valley Poppy Reserve
If you are an avid gardener, chances are good that you love the outdoors. I’m sure you don’t just love being on your knees with your hands in the dirt. Although that part is great, you probably love the sunshine and feel of the wind on your face; the sights and sounds of all that nature has to offer. The wonderful thing about nature is that it’s available to everyone simply by stepping out your front door.
Chances are you have a burden for the earth if you love nature and love being in nature. You, like me, might be concerned about the plight of bees and insects, whose habitats are being destroyed by urban and suburban development and whose lives are threatened by the use of increasingly harsh pesticides in our factory farming practices.
The good news is there’s something simple, beautiful, and wonderful you can do to attract birds and insects to your garden, to give them shelter from the elements, and to help preserve native bees and other species being threatened by these forces. Grow some wildflowers!
The Wildflower Meadow
Wildflower meadows are some of the most enchanting sights in life. I can remember driving through the mountains of the American West as a kid and seeing the wildflower meadows which had been there for centuries, probably, untouched by farming or human hands. The diversity of color and shape is beautiful and captivating. You can sew a wildflower meadow or a simple patch very easily. The best part is you won’t need to water it or cultivate it in any way once it’s been established.
The Planning Stage
You may have already identified the plot of land you wish to turn into a wildflower meadow. Throughout history, wildflower meadows and prairies have sprung up after a disaster – like a fire – has cleared out trees and made an open space. You will simply be helping nature along its natural course by speeding up the process.
In fact, if you want to check out the oldest man-made meadow from seed, go to the University of Wisconsin, Madison Arboretum. In 1935, the Curtis Prairie was started by crews from the Civilian Conservation Corps and has grown into a collection of restored ecosystems that is one of the most extensive in North America. It’s a definite must-see if you want to check out wildflowers this summer.
The next thing you want to do is gather all the information you can get about your patch of land. Ask yourself these questions:
- Does it get the recommended 6 hours of sun per day, or is it a little shady?
- What’s nearby: farmed land, grass, forest?
- Is it a weedy patch or a previously farmed plot of land?
- How open is it; how many trees?
You can consult a local university or do a search online about which plants are native to your area. There are companies which can supply you with the right seed mixture for sunny or partly shaded areas.
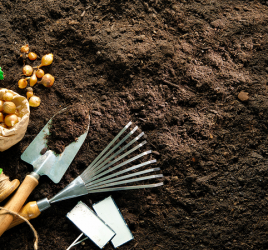
Different Types of Soil
Next, you want to know what kind of soil you’re working with. Is it sandy, clay or loam?
Sandy Soils
These are sometimes called light soils. They have large sized particles, loose and easy to work with. They drain easily, which makes for dry soil. It contains a high percentage of air because it’s not a densely packed soil. Sandy soils are low nutrient soils and often more acidic and less fertile.
Clay Soils
Sometimes called heavy soils, they are opposite of sandy soils in particle size. Clay soils have very small and densely packed soil particles. They’re harder to work with because of how the particles bond together – like clay! Most clay soils dry out completely on top in the summer and become hard, sometimes very hard. They are nutrient-rich and can hold water well. Clay soils can be quite productive.
Loam Soils
These soils are between clay and sand. They are the best possible scenario as they have properties of both, are usually fertile, hold water and provide good drainage. They can be easy to work with and very productive. Wildflowers, like most plants, do best in loam soil.
You can do a squeeze test by digging a small hole, 12 inches deep, and taking dirty from that depth. You can either squeeze a handful of dirt in your hands or rub it between your thumb and finger to sense the properties. Is it slick and forms a ball quite easily? That’s probably clay. Is it gritty and runs through your hands? That’s sand. If it’s between the two, you have loam!
In addition, you also need to be aware of how high the water table is on your site. Does water stand or pool in places on your site during the wet times of year or is it always dry and almost never wet? If it’s wet for a good part of the year, you may have heavy clay soil or you may be in a low-lying area that is close to the water table.
Preparing Your Site
The next thing you need to do is free your plot of weeds and grasses. Depending on the type of soil, you may be able to plant in the spring or fall. Clay soils will need to be planted in fall. If you have heavy clay, you’ll need a specific type of seed mixture that can thrive in clay soil. If you try to plant clay soil in the spring, your equipment will get stuck in it – it’s still too wet. Sandy and loamy soils can be planted in spring.
The preparation of the soil is the most important part of the process. Once you have this down, and seeds are planted and take over, you won’t have to mess with it again. You must make sure that the seed bed is free of weeds and debris (invasive species like Thistles, Quackgrass, Smooth Bromegrass, Johnsongrass, Canada Goldenrod, Grey Goldenrod, Grey Dogwood, Sumacs, Buckthorn, Tatarian and Japanese honeysuckles, and multiflora rose to name a few.)
For more information on invasive and weedy plants, you can visit Environment Canada or the United States Department of Agriculture).
If it has grass on it now, it must be rototilled. If you plan to make your wildflower meadow next to an area which will still contain invasive species, you will have to mow a 10-foot strip between them to prevent your wildflower meadow from being overtaken.
How to Prevent the Growth of New Weeds
For one or two growing seasons, the work of establishing the wildflowers will be more intense. You can prevent the growth of new weeds by smothering – laying blankets, garbage bags or anything which will keep the underlying weeds from taking root again – or cultivating, which is basically tilling or plowing every 2-3 weeks. Additionally, be aware that if you wait too long between cultivations, the weeds will take hold again and you will have to start over.
Herbicides and Cultivation
You can also use herbicides or a combination of herbicides and cultivation, although herbicides are generally worse for the environment and if you can avoid using them, you should. One more natural herbicide you can use is vinegar, however, vinegar used too heavily will render the soil infertile, so be careful!
I can’t stress enough how important the preparation is for establishing a wildflower meadow. Most of them fail because they are overtaken by invasive weeds. Sometimes it makes more sense to plow or till for two growing seasons in order to reduce the population of weedy species drastically before you spread your seed. I’ve even heard of planting oats or buckwheat to take care of a patch overtaken by rowdy grasses before beginning to sow your native flowers and grasses. Whatever method, be prepared to do a lot of preparation. It will be well worth it in the long run.
Take Away
There are many great reasons to plan and execute a wildflower meadow or patch on your property. Putting in some thought and extra work for a season will give you years and years of enjoyment and provide shelter for all those beneficial birds and insects we love. For more about wildflower meadows please see How to Cultivate Your Wildflower Meadow!
This is a really thought out and informative article! Wildflowers are very beautiful, so growing them in your own garden is a great idea.
The preparation stage definitely sounds important, but I guess in the end the work is worth it.
This was a brilliant read so thank you for sharing, I look forwards to reading part 2!
Hi Kevin,
I’m glad to hear you enjoyed the article! Thank you for your input!
~ Jeff