Everything You Need to Grow Stunning Hostas
Have you felt overwhelmed by the idea of landscaping your yard?
Knowing how to handle all the different spaces can be difficult, especially when you are a newbie to gardening and landscaping. Having an easy, yet beautiful plant that is hardy can be the key to a beautiful backyard. Look no further for a low-maintenance, stunning, but super easy plant then the hosta.
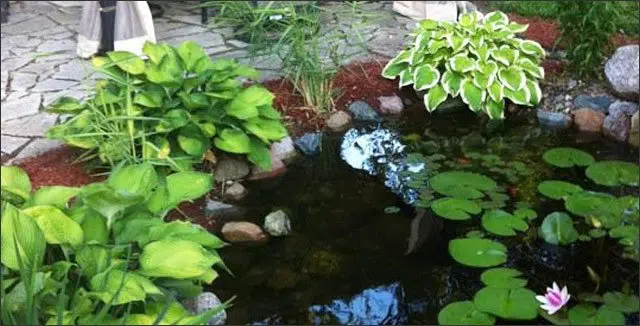
The hosta is a perennial plant that is easy to grow and is known for its beautiful foliate. They come in a wide variety of shapes, sizes and colors. Not only are they super easy to grow, they can handle some shade and can be put just about anywhere and thrive.
A Brief History of Hostas
Hostas are believed to have originated from eastern Asia from China to Japan and Korea. They are native to forests and prefer growing in light shade. In the late 1700s, hosta seeds were sent to France, and shortly after, the first hostas appeared in London. Hostas made their way to America the early 1800s.
In 1812, the Austrian botanic, Leopold Trattinnick, grouped all known species into the genus Hosta. He named the group after his fellow countryman, the Austrian botanist and physician, Nicolas Thomas Host.
Today, there are approximately 40 different species although they are all referred to as hostas.
How to Grow Stunning Hostas
Here is everything you need to know to help you grow stunning, organic hostas in your yard.
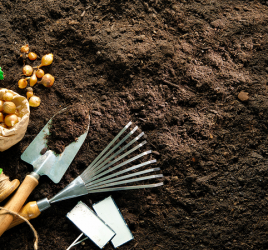
Soil
When it comes to growing hostas they will grow best in rich organic soil. If you are blessed with a natural loamy soil, you might not need to add anything. However, if you are like most people, adding a little bit of compost will help to make your hostas thrive.
The recommended soil is well drained, has a slightly acidic pH, and is enriched both with nutrients and organic matter. Specifically, hostas also like a slightly acidic to slightly alkaline soil which ideally is a pH range of 6.5-7.5. If you notice that your soil is a little on the high side, you can add some organic Canadian peat moss or cottonseed meal to help lower the pH level.
Planting
When making a hosta bed, create a depth of 12 – 16 inches. The roots will grow out horizontally, so having a large and wide hole will be best. The next step that you will want to make is to apply 6 inches of organic matter and mix it. Using organic matter or organic compost will help create a nutrient rich soil that will give your hosta the basic material to thrive. Hostas like well-drained soil, so the addition of organic matter will help to raise the bed, which will help the drainage.
Water is needed for your hosta plant to really thrive. So, after you have placed the hosta inside the hole and planted, make sure to water. After planting, your hosta plant should receive about an average of one inch of water a week. If you are noticing that the leaf tips are starting to brown, it might be a sign that your plant is under stress because it isn’t receiving enough water.
The Color of a Hosta Leaf
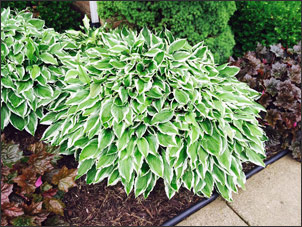
Variegated Hosta
Hostas can have a wide variety of colors to their leaves such as blue, green, gold, or even yellow. If you have noticed a blue color hosta, it is actually a green leaf that is coated with a wax that makes it look like it is blue. Due to the heat of the summer and the exposure to sun it appears that the wax tends to “melt” the leaf.
Leaf color may also be affected by the amount of sun the leaves receive. Hosts can also come in a multi colored variety. These leaves may be a combination of lighter and darker shades of color in the leaf. “Medio variegated” leaves will show a light color in the center of the leaf, which may be white, gold, yellow, or light green. “Marginally variegated” leaves show a light color on the edge of the leaf.
If you have noticed that you have a little bit of a slug problem, then you might want a hosta plant where the leaves are thick and stiff. These hostas are termed “rugose” or are said to have “heavy substance”. These are known to be more tolerant to slug problems.
Propagating Hostas
Propagating your hostas might be the only real maintenance part of hostas that you will need to do. A hosta plant reaches maturity about six to eight years old and you might have noticed that it has overgrown the area that you planted it in.
This is a perfect opportunity to split your hosta to allow for continued growth. The great part about propagating is that it isn’t that hard to do, and you can replant the other part of the hosta in another location in your yard or sell the plant.
When thinking of dividing your hosta, the main question to ask yourself when thinking of propagating your hosta is when you should divide it. The answer is simple, when no shoots are growing from the center of the mature clump.
It might be easiest to divide in the spring, however, summer division is preferred. It can be done in August and should be at least 30 days before the first fall frost date. To make sure to promote better root growth, make sure that there is warm soil and higher humidity.
To learn more, please see Propagating Hostas: When and How to Divide Hostas.
Where to Plant Hostas
Hostas may be native to shaded forests, but the different varieties require different amounts of sunlight. According to Gardening Know How, a good rule of thumb is:
- The lighter the foliage, the brighter the sun.
- Darker foliage retains color the best in moderate shade.
- Hostas with variegated foliage need more sunlight to retain the white and gold strips.
Take Away
Hostas can make a yard look amazing. They are easy to grow and are low-maintenance. The beautiful colors that hostas come in will help to make any yard look great.
Your Turn
Do you grow hostas in your garden? What variety is your favorite?