Tulips: 8 Great Tips for Growing and Planting Stunning Tulips
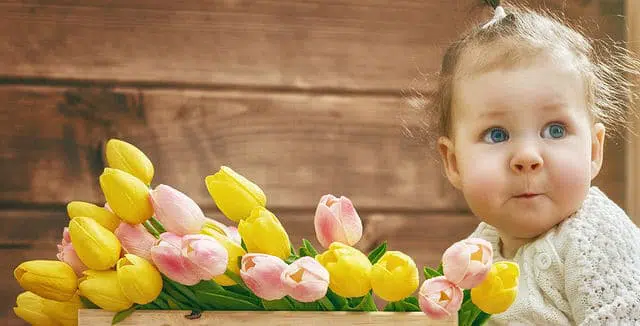
Tulips are among the most favorite flower in America. Their mid spring appearance added by their bright colors are a sight for sore eyes after a long hard winter.
Bright yellows, reds, and purples pop through the cold ground providing true beauty in the spring season. Gardeners love to use these flowers as bright and colorful boarders in their gardens or to add a splash of color to a section in their garden beds. You cannot go wrong when it comes to putting tulips in your garden.
Tulip History
Holland is the country that is known for its beautiful flowers. However, the tulip originally came from present day Turkey and were then imported into Holland in the sixteenth century.
In 1592, Carolus Clusius wrote a book on tulips, and the tulip flower soared in popularity. People would come and steal bulbs out of Clusius’ garden they were in such high demand.
In addition, the bulbs were used as money. In fact, a handful of tulip bulbs in the 17th-century Holland was so in demand they were worth about $44,000 according to The Old Farmers Almanac. The flowers became so expensive that the market in them eventually crashed.
Today, towns like Holland, Michigan and New York host tulip festivals each year honoring this famous flower and their Dutch history.
How to Add Tulips to Your Garden
If you are looking to incorporate tulips into your garden, you will not be disappointed. Their long stems and cup shaped color flower will add live and beauty to every garden. Thankfully, tulips no longer cost such a high price as they did in 17th century Holland. Yet, there are a few steps to take to ensure that you have healthy and thriving tulips year after year.
8 great tips for growing and planting stunning tulips
- Tulips are perennials.
A perennial is a type of plant that comes back year after year. This is in contrast to an annual plant that lives for the season and will not return the next year. That means that you only have to do the hard work of planting your tulip bulbs once, and they will return in all their glory year after year.However, they will do best when they are given yearly fertilizer and fresh compost. A tulip bulb has all the nutrients it needs for one year, but will need to take the nutrients from the ground for the additional years. Also, tulips create daughter plants as they divide underground.
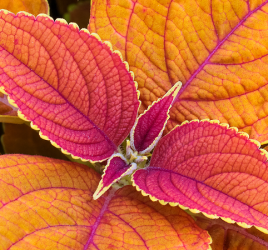
- Choosing a Variety
When it comes to choosing a variety of tulip, you cannot go wrong. Have fun and explore different options and see which ones you like best. There are a number of different kind of tulip varieties to choose from. They come in single, double, ruffled, fringed, or lily-shaped.Wild tulips are small in size – ranging from 3 to 8 inches. The benefit to wild tulips is that they are tougher then hybrids. Hybrids are your classic single flower that have the cup-shape. A few variety favorites are: Cracker Tulip, Ile de France, and Calgary. The Ile de France are known for stems up to 20 inches tall.
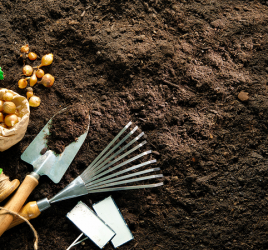
- Plant in The Fall.
Tulips are flowers that do the best in dry summers and cold winters. Plant them 6-8 weeks before the first anticipated hard frost. You will want the soil to be above 60 degrees Fahrenheit. The timing will depend on the zone you live in. For warmer zones, you can wait until late autumn. Colder climates should plan to plant your tulips earlier in the season.To check the best time to plant tulips in your area, please see bulb planting chart by “The Old Farmer’s Almanac.
- Plan The Location
Tulips do best in a location that has moderate sun. If you live in a warm climate zone, plant your tulips in an area that gets morning sun, but not all day sun. The soil needs to be able to drain well as they do not like excessive moisture. The best soil is neutral to slightly acidic. - Plant Deep in the Ground
The bigger the bulb, the deeper into the ground the bulb needs to be. Furthermore, digging a hole at least eight inches is where you want to start. In addition, dig deeper into the soil to break up the soil. This will help with drainage to help give your tulips the best chance for heath and survival. - Water Your Tulips
After you have planted your new bulbs, water them immediately. They do not like to be soaked, but do need water to trigger growth. However, when there are dry spells throughout the fall, give your tulip bulbs a watering to help. - Protect from Predators
If you notice that you have a problem with animals like mice and rodents, you will want to ensure the safety of your precious tulip bulb. There are a number of options that you have to help protect your plants.First, plant a thorny plant such as holly in the planting holes. Another option is to use crushed gravel or kitty litter. Lastly, to protect your tulips from stronger predators, you can plant your bulbs in a cage of wire.
- Care for your Tulips After They Flower
Come springtime when all your hard work paid off from the fall, you will get to enjoy your stunning tulips. Let your tulips shine for a couple weeks.Once the foliage begins to yellow, wait 6 weeks before removing the flower. In addition, you will want to deadhead tulips after flowering. Deadheading a tulip means that you remove the leaves only after they have turned brown. Cut the stem of a tulip at the base.
Bringing It Home
Planting tulips to your garden will add incredible beauty and lovely bright colors that you can enjoy for years to come. The fall is the best time to put your tulip bulbs into the ground. Come springtime, you will be able to sit back and watch bright and beautiful tulips coming bursting through the ground. When you follow these eight tips, you can bet that you will have thriving and healthy flowers that you can enjoy year after year.